Craving the satisfying crunch and succulent interior of classic fried chicken without the mess, guilt, or hassle of deep-frying? Look no further! Our easy oven fried chicken recipe delivers everything you love about the takeout favorite, transformed into a healthier, simpler weeknight meal. Get ready to impress your family with unbelievably crispy and juicy chicken that tastes remarkably like a certain famous fast-food chain, all from the comfort of your own kitchen.
This isn't just another baked chicken recipe; it's a meticulously crafted method to achieve that coveted golden, crackly crust and tender, moist meat, using the power of your oven. Forget the splattering oil and the daunting cleanup – with a few clever tricks and readily available ingredients, you'll be enjoying the best oven fried chicken you've ever made at home. It’s the ultimate solution for those busy evenings when you want a comforting, flavorful dish without spending hours in the kitchen.
Why Oven-Fried Chicken is Your New Weeknight Hero
In our fast-paced lives, convenience often comes at the cost of quality or health. Traditional fried chicken, while undeniably delicious, is typically laden with fat and calories, and the deep-frying process is messy and time-consuming. This oven fried chicken recipe completely flips that script, offering a superior alternative that satisfies all your cravings.
Better-Than-Takeout Flavor, Home-Cooked Goodness
One of the biggest draws of this method is the incredible flavor profile. We’re talking about a seasoned blend that echoes the iconic taste of KFC, but with the transparency of knowing exactly what goes into your meal. When you make it at home, you control the quality of ingredients, from the chicken itself to the spices, ensuring a wholesome and delicious outcome every time. No mysterious oils or preservatives – just pure, honest flavor.
Unrivaled Crispy Texture Without the Fryer
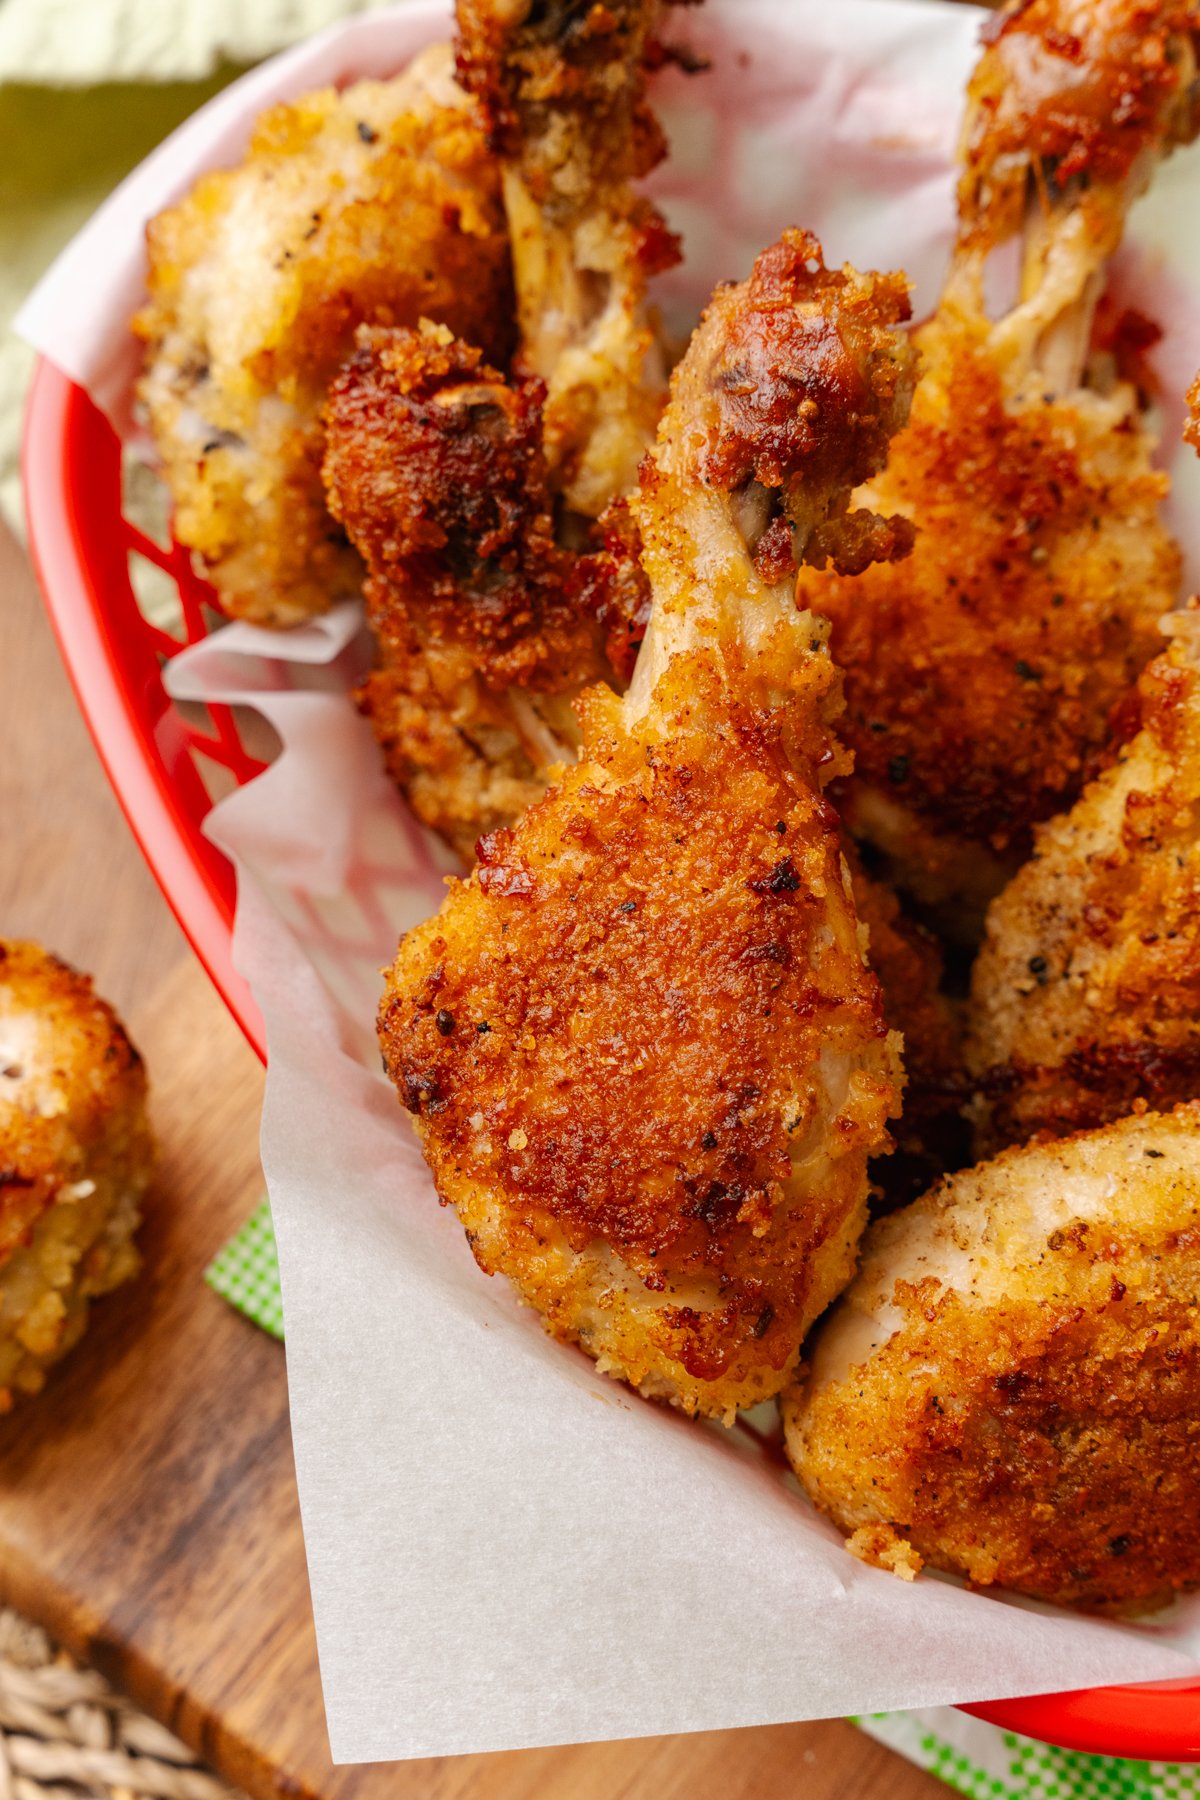
The magic of this recipe lies in how it replicates the signature crunch of fried chicken without a single drop of deep-frying oil. By harnessing the power of a hot oven, a specific breading technique, and a secret ingredient (or two!), your chicken strips will emerge with an incredibly satisfying, golden-brown crust. This is achieved by combining Panko breadcrumbs with flour and a touch of butter, baked at a high temperature on a preheated sheet pan. This combination creates a truly "fried" texture that stands up beautifully to scrutiny. For an even deeper dive into achieving that perfect crunch, check out our guide on Achieve Ultimate Crunch: Oven Fried Chicken with Panko & Butter.
Quick, Easy, and Family-Friendly
Weeknights demand efficiency, and this oven fried chicken delivers. With basic pantry staples and minimal prep, you can have a gourmet-tasting meal on the table in record time. It’s a dish universally loved by both adults and children, making it a guaranteed hit that will disappear fast. The simplicity of the process means even novice cooks can achieve fantastic results, making it an ideal entry point for more adventurous home cooking.
The Secret to Unbeatable Crispy & Juicy Results
Achieving truly crispy and juicy oven fried chicken isn't just about throwing ingredients in a pan; it's about understanding the role each component plays. Here’s a look at the star ingredients and techniques that make this recipe shine.
Essential Ingredients for Perfection
- Chicken: While boneless, skinless chicken breasts cut into strips are convenient and cook quickly, you can absolutely use chicken tenders, thighs, or drumsticks. Just be mindful that cook times may vary. Using bone-in, skin-on pieces can add extra flavor and moisture, though the breading might not be as universally adhered. Aim for about 1.5 pounds of chicken.
- The Breading Base: Flour & Eggs: All-purpose flour provides the initial light coating, helping the egg adhere. The beaten eggs act as a crucial binder, ensuring your crispy coating sticks firmly to the chicken. For those with dietary needs, gluten-free flour can be a seamless swap.
- The Crispy Crusaders: Panko & Butter: This duo is where the magic truly happens for the crunch. Panko breadcrumbs, with their larger, flaky structure, create an airier, crispier coating than regular breadcrumbs. Melting butter on your baking sheet before adding the chicken is a game-changer; it mimics the fat from deep-frying, helping the breading get wonderfully golden and crunchy as it bakes. For a gluten-free Panko alternative, crushed pork rinds work surprisingly well!
- Flavor Powerhouses: Seasoned Salt & Paprika: A good seasoned salt (like Lawry’s) provides a foundational savory punch, while paprika adds a beautiful color and a subtle sweetness and depth. Don't underestimate the impact of these two; they're key to that irresistible "KFC-like" taste. For those who like a little heat, a dash of cayenne pepper can be added alongside the paprika. Garlic and onion powder further enhance the savory profile, creating a truly robust seasoning blend.
- The Buttermilk Advantage: (Optional but highly recommended) Soaking your chicken in buttermilk for at least 30 minutes (or even overnight) tenderizes the meat, infuses it with a subtle tangy flavor, and helps the breading adhere even better. No buttermilk? No problem! Simply mix regular milk with a splash of vinegar or lemon juice and let it sit for 5-10 minutes before using.
Key Techniques for Maximum Crispiness
- High Heat & Preheated Pan: This is non-negotiable for a truly crispy exterior. Baking at a high temperature (around 400-425°F or 200-220°C) ensures the coating crisps up quickly. Even more critical is preheating your baking sheet with a generous amount of butter in the oven. When the chicken hits that hot, buttery surface, it immediately starts to "fry," creating that coveted golden crust. This prevents a soggy bottom and encourages a uniform crispness.
- The Perfect Breading Station: Set up a dredging station with one shallow dish for whisked eggs (or buttermilk), and another for your flour-Panko-seasoning mixture. This makes the coating process efficient and ensures every piece is evenly covered.
- Don't Crowd the Pan: Ensure there's enough space between each piece of chicken on the baking sheet. Overcrowding traps steam, which can lead to soggy chicken instead of crispy. Use two sheets if necessary.
Crafting Your Perfect Oven-Fried Chicken: A Step-by-Step Guide
Making delicious oven fried chicken is surprisingly straightforward. Follow these simple steps for a truly impressive weeknight meal.
Preparation is Key
- Preheat Your Oven & Pan: Begin by preheating your oven to 400-425°F (200-220°C). Place a stick of butter (or equivalent if using multiple pans) directly onto your baking sheet(s) and put it into the oven as it preheats. This allows the butter to melt and the pan to get searing hot, which is vital for crispiness.
- Prep the Chicken: If using chicken breasts, pat them dry with paper towels and cut them into even strips, roughly 1-inch thick. This ensures even cooking. If using buttermilk, soak your chicken strips in it for at least 30 minutes, then drain any excess.
- Set Up Your Dredging Station: In one shallow dish, whisk your eggs until well combined. In a second shallow dish, combine your Panko breadcrumbs, all-purpose flour, seasoned salt, paprika, garlic powder, and onion powder. Mix well to ensure the seasonings are evenly distributed.
The Coating Process
Working with one chicken piece at a time:
- Dip the chicken piece into the whisked egg (or buttermilk), ensuring it's fully coated. Let any excess drip off.
- Transfer the chicken to the breadcrumb mixture. Press firmly on both sides to ensure a thick, even coating. The more breading, the crispier your chicken will be!
- Carefully remove the hot baking sheet from the oven. Arrange the coated chicken strips on the hot, melted butter. Ensure there's space between each piece to allow for even crisping.
Baking to Golden Perfection
Bake your chicken for approximately 20-25 minutes, flipping halfway through. The exact time will depend on the thickness of your chicken and your oven. The chicken is ready when it's golden brown, crispy, and cooked through (internal temperature reaches 165°F or 74°C). The vibrant golden hue is a sign of perfectly baked, incredibly delicious oven fried chicken.
Elevating Your Meal: Serving Suggestions & Variations
Your perfectly cooked oven fried chicken is a star on its own, but pairing it with the right sides and sauces can transform it into an unforgettable feast. This dish is so versatile, you'll find endless ways to enjoy it!
Delicious Dipping Sauces
The beauty of homemade fried chicken lies in its adaptability to various dipping sauces. Think beyond ketchup! Here are some fantastic options:
- Spicy Mayo: A simple mix of mayonnaise and sriracha for a creamy kick.
- Sweet and Sour Sauce: A tangy, fruity complement that’s especially kid-friendly.
- Homemade BBQ Sauce: Classic and comforting, offering smoky and sweet notes.
- Honey Mustard: A perennial favorite, balancing sweetness with a gentle tang.
- Ranch Dressing: Cool and herbaceous, a refreshing contrast to the crispy chicken.
Perfect Side Dishes
Complete your weeknight meal with sides that complement the crispy chicken:
- Creamy Mashed Potatoes: A classic pairing that’s always a crowd-pleaser.
- Coleslaw: A crisp, refreshing, and tangy counterpoint to the rich chicken.
- Corn on the Cob or Steamed Green Beans: Simple vegetable options for a balanced meal.
- Macaroni and Cheese: The ultimate comfort food side dish.
- Fresh Garden Salad: A light, vibrant option to cut through the richness.
Creative Variations
Don’t be afraid to experiment with your oven fried chicken recipe:
- Spice it Up: Add extra cayenne pepper, smoked paprika, or a dash of chili powder to your breading mix for a spicier kick.
- Herbaceous Twist: Incorporate dried herbs like thyme, oregano, or rosemary into the flour mixture for an aromatic flavor profile.
- Cheese Please: Mix a few tablespoons of grated Parmesan cheese into the breading for a savory, cheesy crust.
- Different Cuts: While strips are easy, try drumsticks or small thighs. Adjust baking time as needed – larger cuts will require longer.
For even more insights into achieving that perfect KFC-like flavor and crispiness without a deep fryer, consider exploring our detailed article on Crispy Oven Fried Chicken: KFC Taste, No Deep Fryer Needed.
Mastering Your Oven Fried Chicken: Troubleshooting & Pro Tips
While this oven fried chicken recipe is incredibly forgiving, a few expert tips can elevate your results from great to truly extraordinary. Here's how to ensure success every time and troubleshoot common issues.
Common Challenges and Solutions
- Soggy Bottom: The most common complaint with oven-fried chicken. The solution? Always preheat your baking sheet with butter. This instant sizzle prevents steam from accumulating underneath the chicken, leading to a perfectly crisp base. Also, ensure you're not overcrowding the pan.
- Breading Falling Off: Make sure your chicken is patted completely dry before dipping in the egg/buttermilk. After dipping in the egg, allow excess to drip off before transferring to the breading. Press the breading firmly onto the chicken from all sides. If using buttermilk, the acidity also helps the coating adhere better.
- Dry Chicken: Overcooking is the main culprit. Use a meat thermometer to check for an internal temperature of 165°F (74°C). Chicken strips cook relatively quickly, so keep an eye on them. The buttermilk soak also helps prevent dryness.
- Uneven Browning: Ensure your chicken pieces are cut to a similar thickness. Flipping them halfway through the baking process is also crucial for even browning and crispness on both sides.
Pro Tips for the Best Results
- Use a Wire Rack: For even crisper results, you can place the coated chicken on a wire rack set inside your preheated baking sheet with butter. This allows hot air to circulate all around the chicken, minimizing contact with the pan and maximizing crispiness. Just ensure butter is still melting under the rack.
- Don't Skimp on the Butter: That melted butter isn't just for flavor; it's essential for achieving that "fried" texture in the oven. It helps the breading to crisp up and brown beautifully.
- Experiment with Seasonings: While our blend is designed for that "KFC taste," feel free to adjust. Add more heat with a pinch of cayenne, or a smoky depth with chipotle powder. A tiny bit of baking powder in your flour mixture (around ½ teaspoon per cup of flour) can also help the breading puff up slightly for an even lighter crunch.
- Rest the Chicken: Just like with other meats, allowing your oven fried chicken to rest for 5-10 minutes after baking allows the juices to redistribute, resulting in more tender and juicy meat.
- Make Ahead Prep: You can prepare the breading mixture in advance and store it in an airtight container. You can also buttermilk soak the chicken overnight, making assembly even quicker on a busy weeknight.
This comprehensive approach ensures that every batch of your oven fried chicken is a resounding success, making it a staple in your weeknight rotation.
Conclusion
Embrace the joy of truly crispy and incredibly juicy oven fried chicken – a healthier, easier, and undeniably delicious alternative to traditional deep-fried versions. This recipe proves that you don't need a deep fryer to achieve that coveted golden crunch and succulent interior. With a few simple ingredients, smart techniques like using Panko breadcrumbs, melted butter, and high heat, you can recreate a takeout classic in your own kitchen, perfectly tailored to your family's tastes.
Whether you're looking for a quick weeknight dinner, a crowd-pleasing party snack, or just a healthier way to enjoy your favorite comfort food, this oven-baked marvel is your answer. So ditch the drive-thru, fire up your oven, and prepare to be amazed by the ultimate homemade oven fried chicken. It’s more than just a meal; it’s a revelation!
